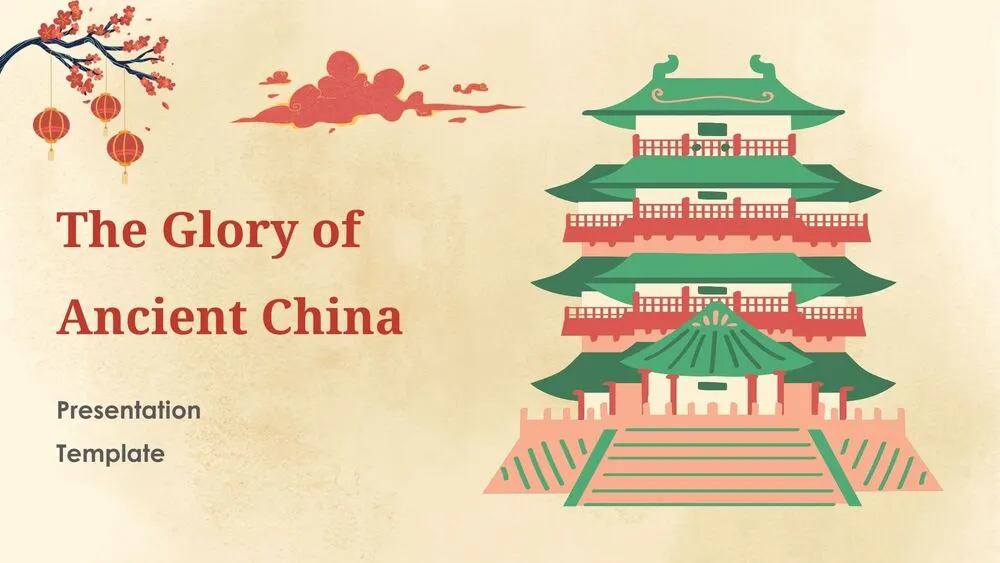
China Presentation Templates and Slides – Free & Premium for PowerPoint, Canva & Google Slides
Teach and present China clearly—maps, dynasty timelines, landmarks, inventions, and festival visuals ready to edit ⬇️

Teach and present China clearly—maps, dynasty timelines, landmarks, inventions, and festival visuals ready to edit ⬇️
✨ Build lesson-ready and business-friendly decks with China presentation templates for PowerPoint, Google Slides, and Canva. Use editable maps, dynasty timelines, landmark illustrations, and icons for inventions, trade, and culture.
For history classes, sequence ancient to modern: prehistoric cultures, early states, the Qin and Han, Tang–Song innovations, Ming voyages, and later reforms. Add festivals (Spring Festival, Mid-Autumn) and arts—calligraphy, porcelain, silk, and architecture—through clean, readable layouts.
For reports, combine demographics, economy snapshots, and trade routes with charts and infographics. Keep colors accessible (reds and neutrals with high contrast) and use consistent legends and captions so learners and stakeholders can follow the story at a glance.
A themed slide deck with maps, timelines, landmarks, and cultural icons to teach history or present country overviews with clarity.
Open with geography & early cultures, then dynasties and innovations, daily life & arts, and close with review questions or a simple timeline quiz.
Yes—use fonts that support CJK characters. Pair decorative calligraphy for titles with a clean sans-serif for body text to keep readability high.
Use respectful imagery, limit clichés, and keep contrast strong (red/neutral palettes). Add concise captions for artifacts, places, and dates.
¿Te gustaría recibir acceso anticipado a nuevas plantillas de presentación gratuitas, consejos de diseño y novedades exclusivas? Suscríbete a nuestro boletín hoy mismo.
Canva es la forma más rápida y sencilla de personalizar tu plantilla.
Edita textos, colores, imágenes y diseños con solo unos clics, sin necesidad de instalar ningún programa.
✨ Incluye:
PASO 1. Haz clic en el botón azul “Canva” para descargar el archivo en formato .pptx.
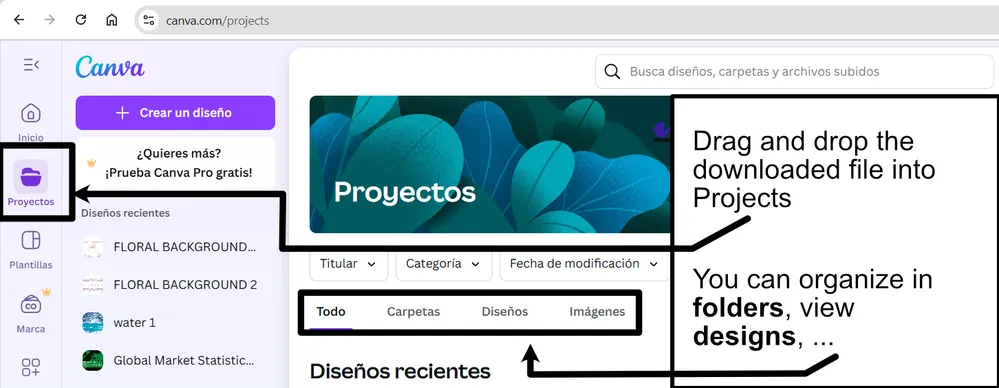
PASO 2. Arrastra y suelta el archivo descargado en la sección Proyectos de tu panel de Canva.
Dentro de Proyectos encontrarás pestañas como Carpetas, Diseños, Imágenes y una sección “Todo” que las agrupa. En la barra lateral izquierda verás además muchas herramientas útiles para editar tu presentación.
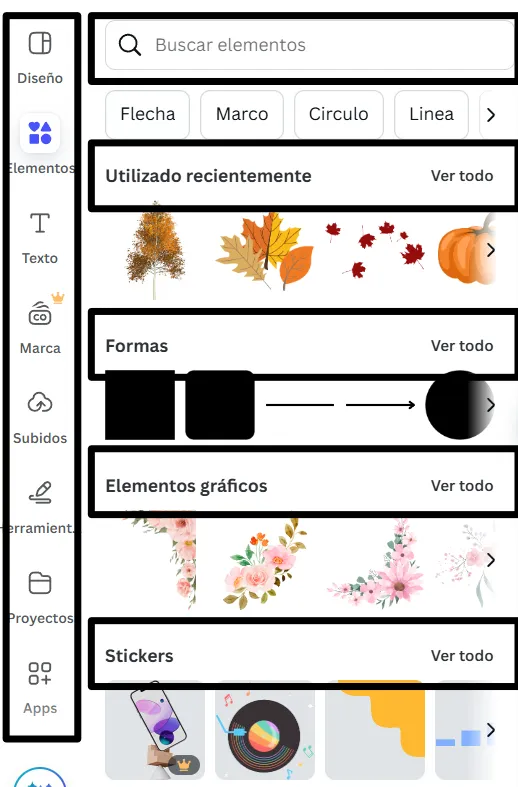
PASO 3. Al abrir la plantilla, verás en el panel izquierdo las diapositivas prediseñadas, junto con elementos como fotos gratuitas y premium, vectores, textos, archivos subidos y otras herramientas o aplicaciones disponibles en Canva.
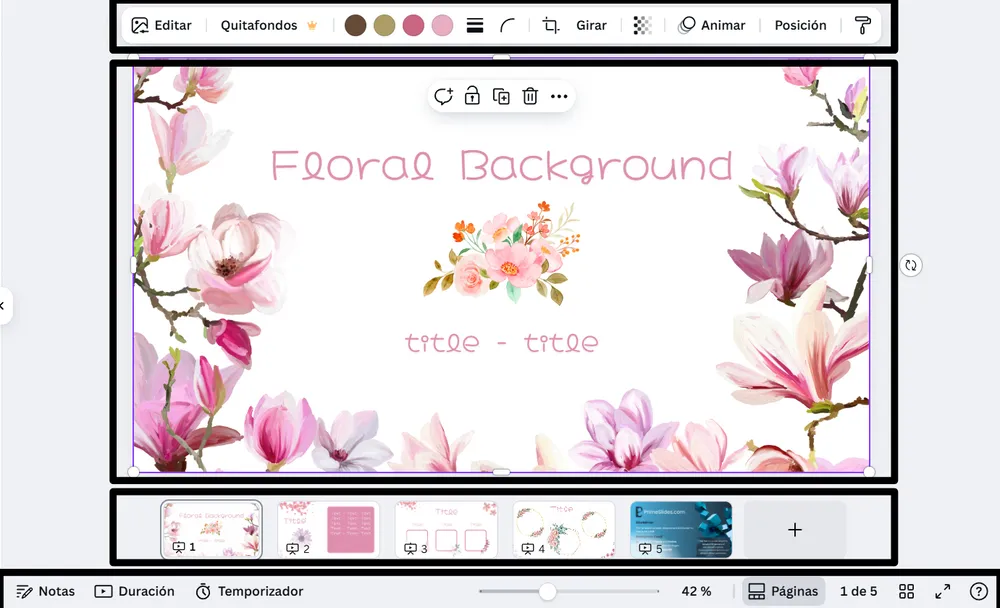
PASO 4. En el centro de la pantalla se mostrará la diapositiva activa.
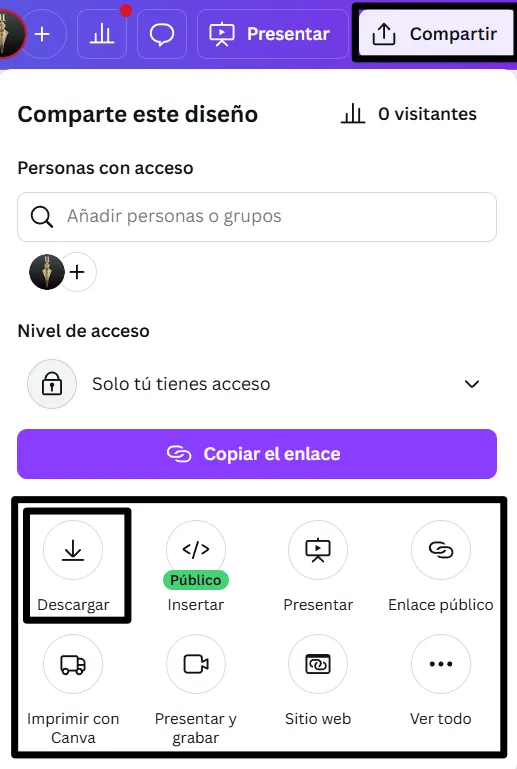
PASO 5. Cuando termines de editar, haz clic en “Compartir” para acceder a varias opciones: Descargar, Presentar, Insertar en un sitio web, Crear un enlace público, y más.
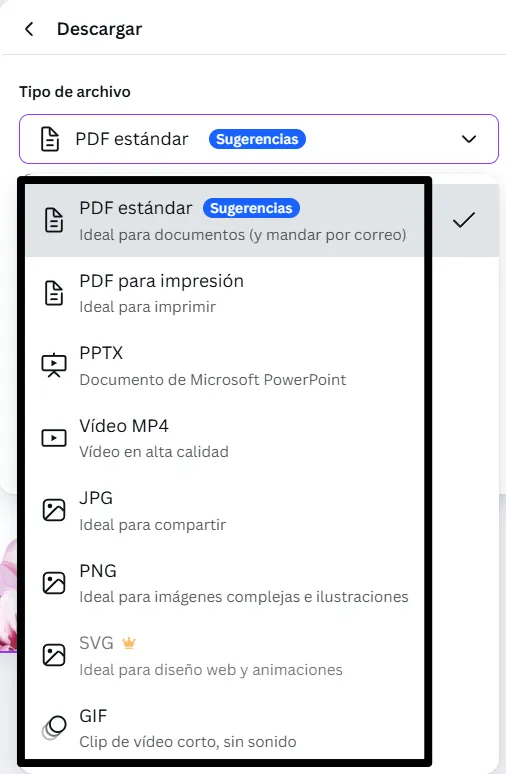
PASO 6. Puedes exportar tu presentación en varios formatos: PDF, PPTX, vídeo, JPG, PNG, entre otros.
Canva is the fastest and easiest way to personalize your template.
Edit text, colors, images, and layouts with just a few clicks — no software needed.
✨ Includes:
– STEP 1. Click the blue “Canva” button to download the .pptx file.


– STEP 2. Drag and drop the downloaded file into the Projects section of your Canva dashboard.
Inside Projects, you’ll find tabs like Folders, Designs, Images, and an “All” section that combines them. On the left sidebar, you’ll see even more useful tools.
– STEP 3. Once you open the template, you’ll find on the left, pre-designed slides, elements like free and premium photos, vectors, text, uploads, and other tools or apps available in Canva.


– STEP 4. In the center, you’ll see your active slide.
At the top, there’s a toolbar with options like Edit, Background Remover (premium), color controls for selected elements or images, and other text/image tools.
At the bottom, you’ll see a slide navigator with all pages and a “+” button to add a new slide.
At the very bottom, there’s an extra toolbar with options for Notes, Presentation Duration, Timer, etc.
– STEP 5. Download the .pptx file. When you’re done editing, click “Share” to see multiple options: Download, Present, Embed on a Website, Create a Public Link, and more.

– STEP 6. You can export your presentation in several formats: PDF, PPTX, Video, JPG, PNG, etc.

Do you want early access to new free presentation templates, design tips, and exclusive updates? Join our newsletter today.
