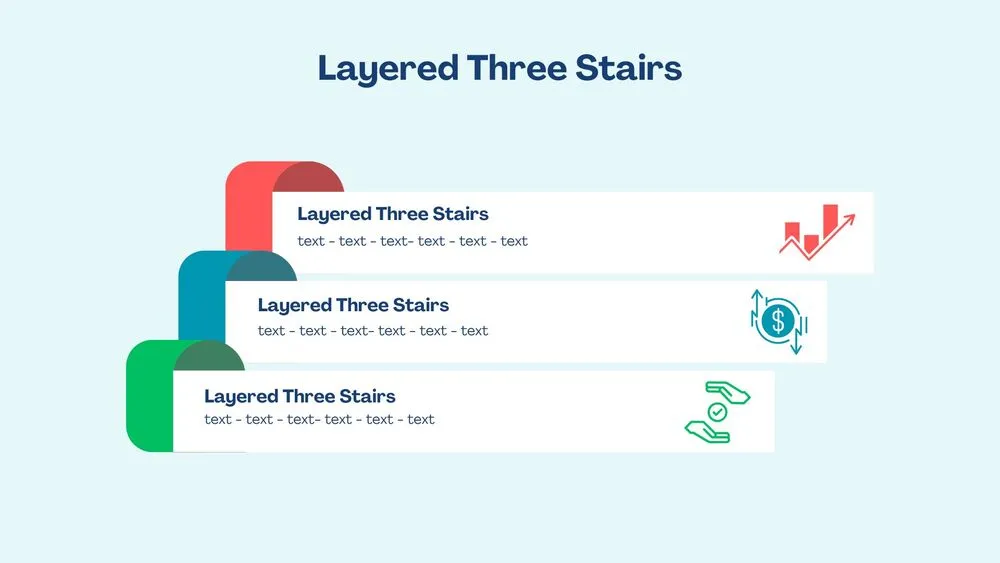
Stairs Diagram Presentation Templates and Slides – Free & Premium for PowerPoint, Canva & Google Slides
Show step-by-step progress and growth with clear, labeled stairs diagrams ⬇️

Show step-by-step progress and growth with clear, labeled stairs diagrams ⬇️
Visualize progress with a stairs diagram—each step shows a phase, level, or action. Start in a stairs diagram PowerPoint layout for precise alignment, collaborate in a Google Slides stairs diagram, or use matching Canva designs to draft onboarding flows and growth plans quickly.
Pick horizontal or vertical stairs diagram templates with icons, numbers, and captions. Combine with timeline and milestones slides to add dates, and pair with KPI/OKR cards to quantify progress. Keep one outcome per step, use high-contrast labels, and maintain consistent spacing for easy scanning.
All themes work across PowerPoint, Google Slides & Canva. Apply brand palettes, paste data from Sheets/Excel, and export to PDF/PNG for handouts. For workshops, include checklists and a closing action plan so your stairs diagram turns into a concrete roadmap.
A step-by-step visual that shows progress or levels—each stair represents a phase, task, or milestone toward a goal.
PowerPoint offers precise alignment; Google Slides is ideal for collaboration. Both export cleanly to PDF/PNG and support brand palettes.
Limit colors, use short labels, and place one outcome per step. Add icons for scanning and a one-line takeaway above the graphic.
Yes—start with basic free stairs layouts, then upgrade to premium packs for alt orientations, icons, and timeline integrations.
¿Te gustaría recibir acceso anticipado a nuevas plantillas de presentación gratuitas, consejos de diseño y novedades exclusivas? Suscríbete a nuestro boletín hoy mismo.
Canva es la forma más rápida y sencilla de personalizar tu plantilla.
Edita textos, colores, imágenes y diseños con solo unos clics, sin necesidad de instalar ningún programa.
✨ Incluye:
PASO 1. Haz clic en el botón azul “Canva” para descargar el archivo en formato .pptx.
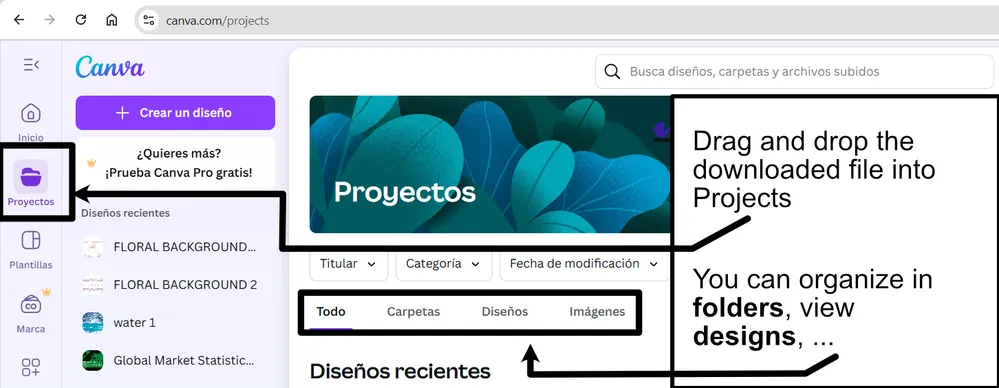
PASO 2. Arrastra y suelta el archivo descargado en la sección Proyectos de tu panel de Canva.
Dentro de Proyectos encontrarás pestañas como Carpetas, Diseños, Imágenes y una sección “Todo” que las agrupa. En la barra lateral izquierda verás además muchas herramientas útiles para editar tu presentación.
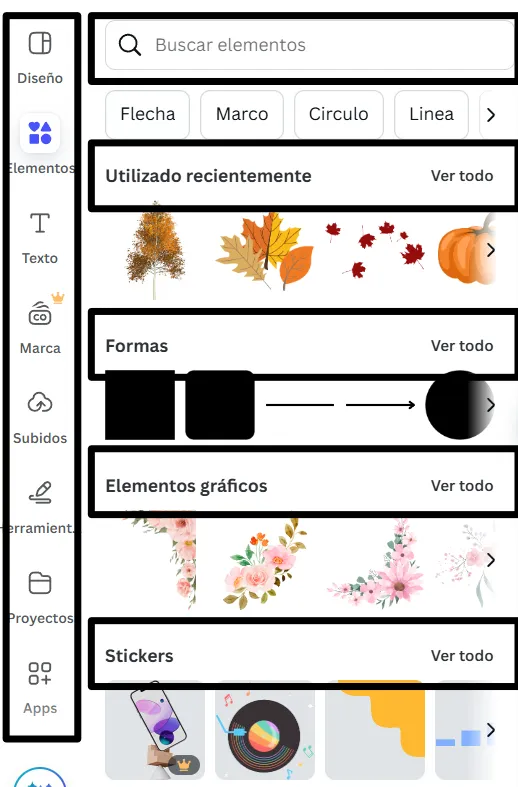
PASO 3. Al abrir la plantilla, verás en el panel izquierdo las diapositivas prediseñadas, junto con elementos como fotos gratuitas y premium, vectores, textos, archivos subidos y otras herramientas o aplicaciones disponibles en Canva.
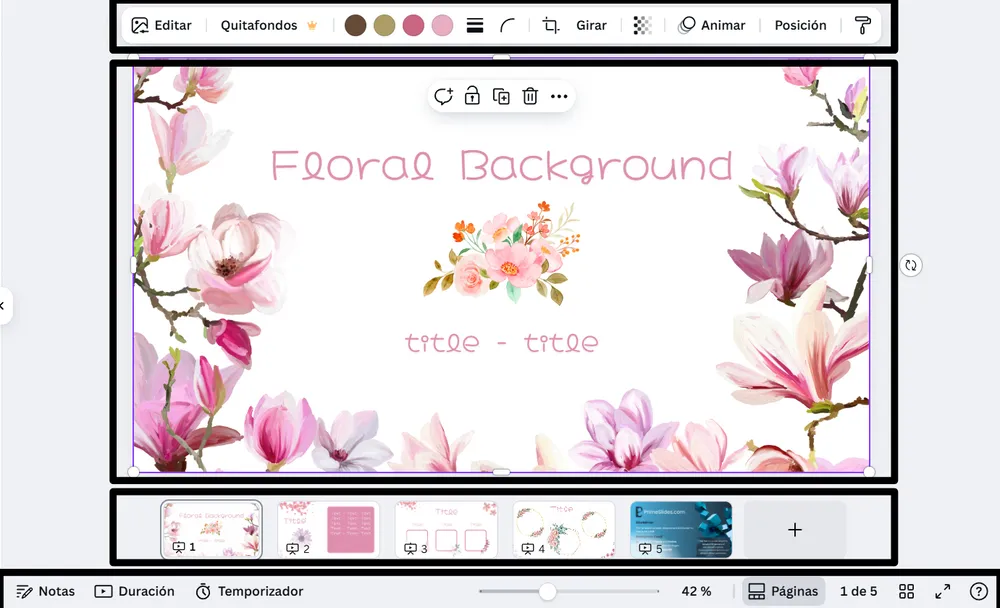
PASO 4. En el centro de la pantalla se mostrará la diapositiva activa.
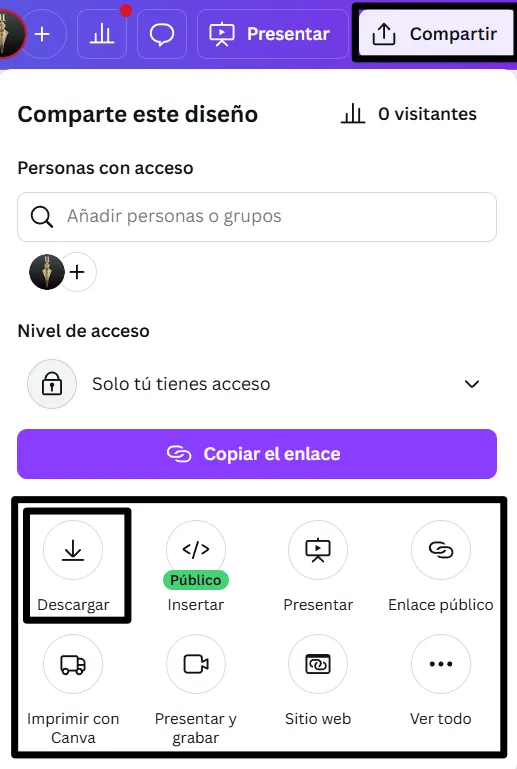
PASO 5. Cuando termines de editar, haz clic en “Compartir” para acceder a varias opciones: Descargar, Presentar, Insertar en un sitio web, Crear un enlace público, y más.
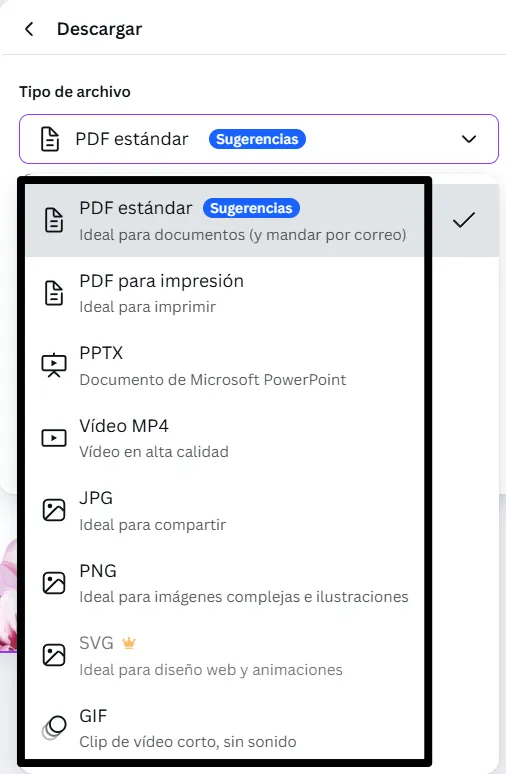
PASO 6. Puedes exportar tu presentación en varios formatos: PDF, PPTX, vídeo, JPG, PNG, entre otros.
Canva is the fastest and easiest way to personalize your template.
Edit text, colors, images, and layouts with just a few clicks — no software needed.
✨ Includes:
– STEP 1. Click the blue “Canva” button to download the .pptx file.


– STEP 2. Drag and drop the downloaded file into the Projects section of your Canva dashboard.
Inside Projects, you’ll find tabs like Folders, Designs, Images, and an “All” section that combines them. On the left sidebar, you’ll see even more useful tools.
– STEP 3. Once you open the template, you’ll find on the left, pre-designed slides, elements like free and premium photos, vectors, text, uploads, and other tools or apps available in Canva.


– STEP 4. In the center, you’ll see your active slide.
At the top, there’s a toolbar with options like Edit, Background Remover (premium), color controls for selected elements or images, and other text/image tools.
At the bottom, you’ll see a slide navigator with all pages and a “+” button to add a new slide.
At the very bottom, there’s an extra toolbar with options for Notes, Presentation Duration, Timer, etc.
– STEP 5. Download the .pptx file. When you’re done editing, click “Share” to see multiple options: Download, Present, Embed on a Website, Create a Public Link, and more.

– STEP 6. You can export your presentation in several formats: PDF, PPTX, Video, JPG, PNG, etc.

Do you want early access to new free presentation templates, design tips, and exclusive updates? Join our newsletter today.
