
Teaching Resources Presentation Templates and Slides – Free & Premium for PowerPoint, Canva & Google Slides
Ready-to-teach packs—worksheets, rubrics, posters, and classroom aids you can edit fast ⬇️
Ready-to-teach packs—worksheets, rubrics, posters, and classroom aids you can edit fast ⬇️
Save prep time with teaching resources templates—editable worksheets, rubrics, centers cards, and bulletin board posters. Build packs in PowerPoint for tight layout control, switch to Google Slides for collaboration, and use Canva to spin up matching handouts and classroom signage.
Keep learning goals clear: start with objectives & agenda pages, then add activity instructions, exit tickets, and assessment trackers. Pair visual aids with charts, timelines, and infographics for science, history, or maths units. Use high-contrast colors, large headings, and short directions to support accessibility and fast scanning.
Everything is fully editable across PowerPoint, Google Slides, and Canva. Apply school branding, paste data from Sheets/Excel, and export to PDF/PNG for print. For seasonal needs, duplicate masters and swap icons/colors—your teaching resources stay consistent week after week.
Ready-to-edit slides for classroom use—worksheets, rubrics, posters, and trackers—optimized for PowerPoint, Google Slides & Canva.
Use large fonts, clear spacing, and dark text on light panels. Avoid busy backgrounds behind instructions; label charts directly.
PowerPoint for precise layout, Google Slides for collaboration, Canva for quick printables. All export cleanly to PDF/PNG.
Yes—start with free basics (checklists, calendars, rubrics), then upgrade to premium packs for subject sets and icon libraries.


Discover more free presentation templates by platform:
Canva is the fastest and easiest way to personalize your template.
Edit text, colors, images, and layouts with just a few clicks — no software needed.
✨ Includes:
– STEP 1. Click the blue “Canva” button to download the .pptx file.
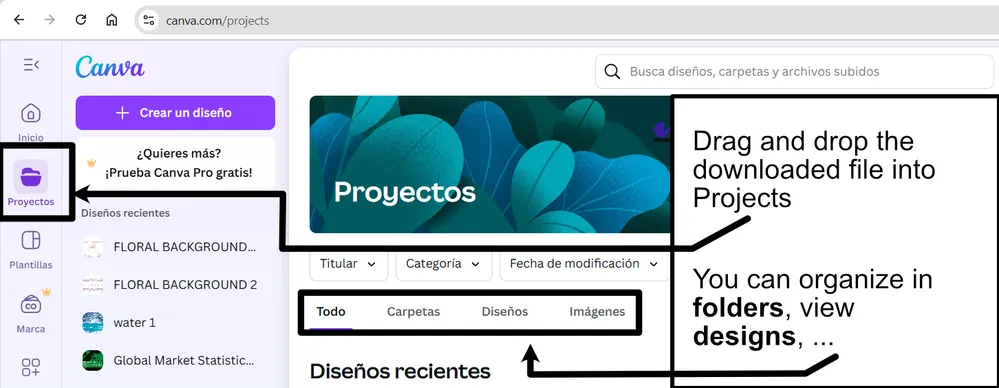
– STEP 2. Drag and drop the downloaded file into the Projects section of your Canva dashboard.
Inside Projects, you’ll find tabs like Folders, Designs, Images, and an “All” section that combines them. On the left sidebar, you’ll see even more useful tools.
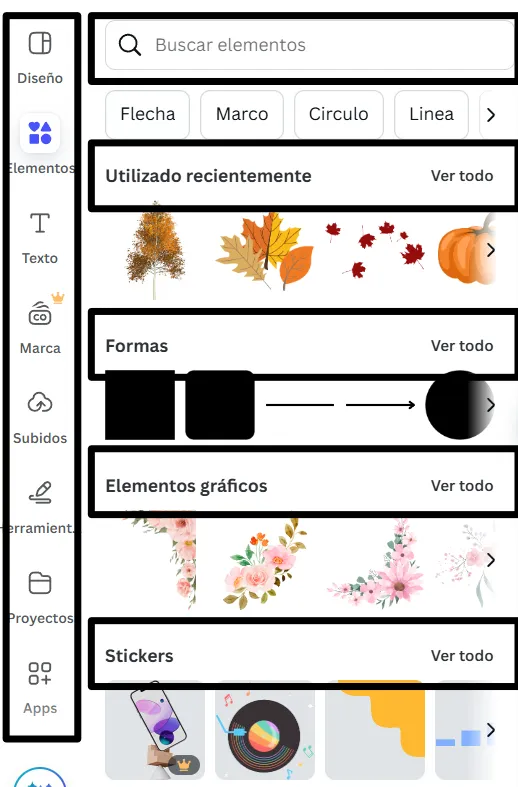
– STEP 3. Once you open the template, you’ll find on the left, pre-designed slides, elements like free and premium photos, vectors, text, uploads, and other tools or apps available in Canva.
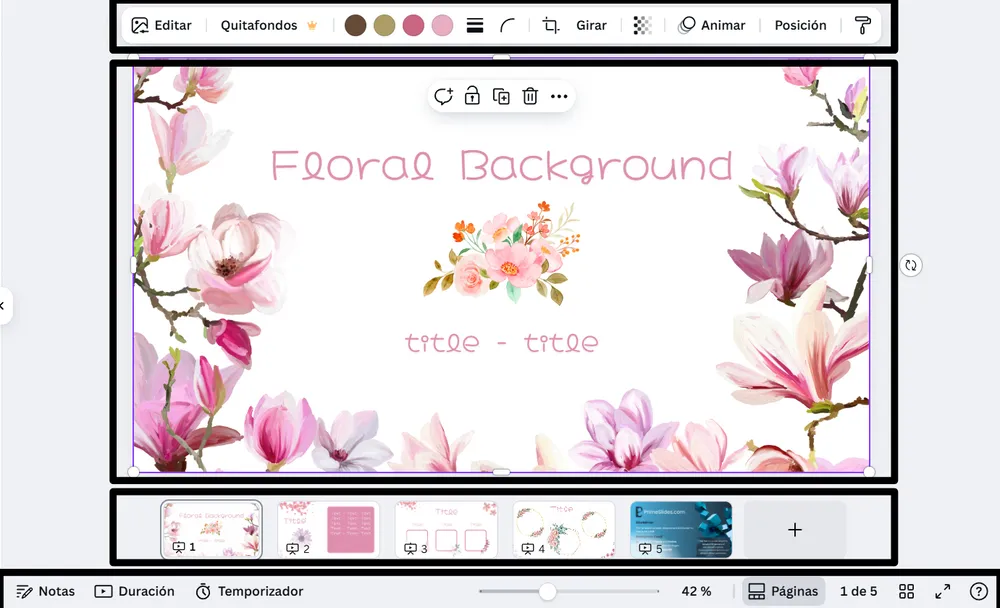
– STEP 4. In the center, you’ll see your active slide.
At the top, there’s a toolbar with options like Edit, Background Remover (premium), color controls for selected elements or images, and other text/image tools.
At the bottom, you’ll see a slide navigator with all pages and a “+” button to add a new slide.
At the very bottom, there’s an extra toolbar with options for Notes, Presentation Duration, Timer, etc.
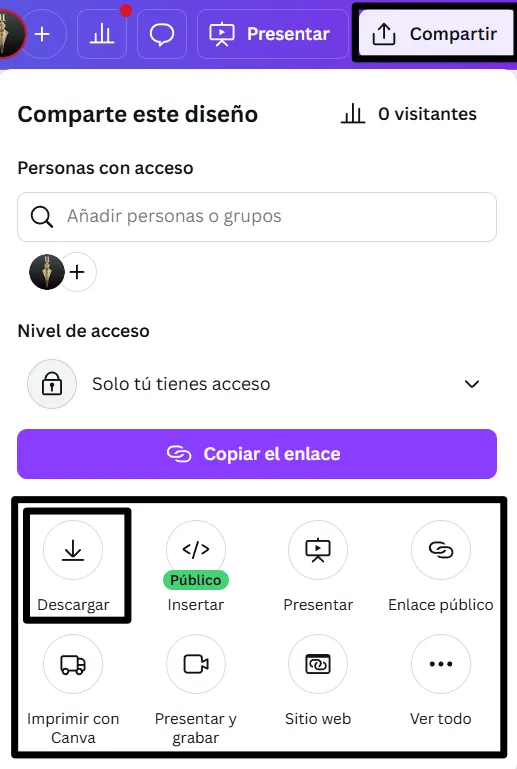
– STEP 5. Download the .pptx file. When you’re done editing, click “Share” to see multiple options: Download, Present, Embed on a Website, Create a Public Link, and more.
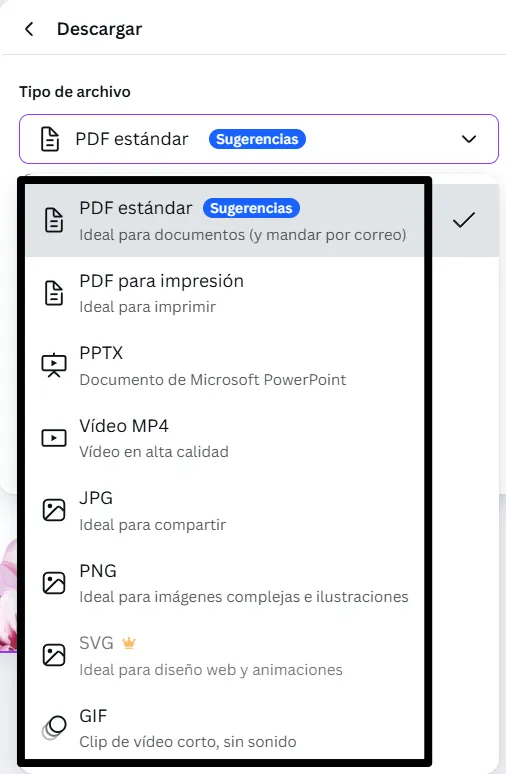
– STEP 6. You can export your presentation in several formats: PDF, PPTX, Video, JPG, PNG, etc.
Do you want early access to new free presentation templates, design tips, and exclusive updates? Join our newsletter today.
